

Want to share what’s on your screen, or tired of Print Screen?
The Snipping Tool was first added to Windows Vista and is included on all newer versions of Windows. This feature is perfect for taking specific capture of something you want to share on your screen or also a quick and easy screen capture to give someone the bigger picture.
To open the Snipping Tool, just like any program, click Start and begin typing “snipping tool” and it will show up as the first program. Click on Snipping Tool to begin.
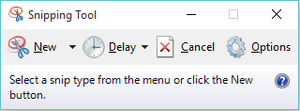
In Snipping Tool, to snip a portion of your screen, click New. Move your cursor to a corner of the section of the screen you want to capture. Hold down your left mouse button and drag it until you have captured the desired portion of the screen. Once you release the mouse button, a new window will pop up allowing you to draw on or edit the captured image.
To save this image, simply select the floppy disk or File and then Save As. If you want to put this image into a Word document, just click the Copy button or Edit and then Copy. While in Word, right click on your mouse and select Paste.
There are several other features including a delay, full screen snip, and a freeform snip that allows you to capture in any shape or size you desire.
The image is stored in three different file types depending on your needs: .png, .gif, and .jpeg (https://en.wikipedia.org/wiki/Snipping_Tool).
(Image source: https://en.wikipedia.org/wiki/Snipping_Tool#/media/File:Windows_10_snipping_tool.png)