

Office 365 adding TXT or MX record for verification
Locate on your DNS host website where you can create a new record
o Sign into your DNS hosting provider
o Choose the website domain name you are working with or purchase a domain name here.
o Locate where you can edit your DNS records
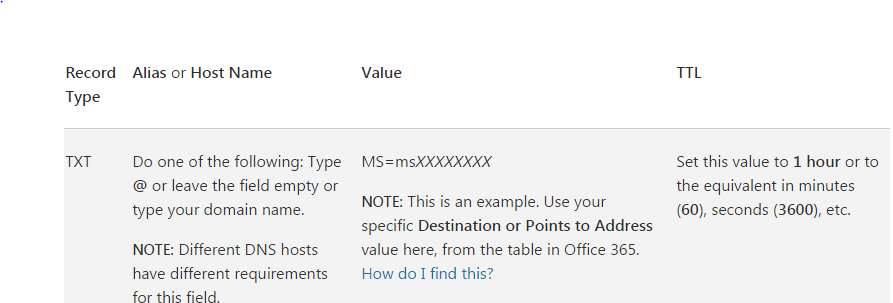
Creating the DNS record
o You will be creating a new TXT type DNS record
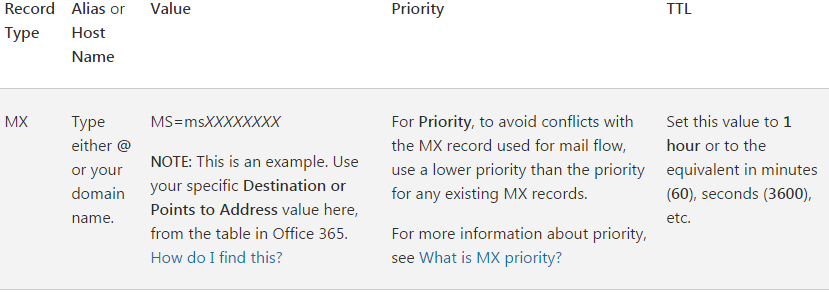
Creating an MX Record
· o Now you will be creating a new MX type DNS record
o Now save the record
Go to Office 365 and request Office to look at the record.
o Go to the domains page
o Go to Manage Domains
o Select the domain you were working with
o In the Actions column select start
o When finished click “okay, I’ve added the record.”
Go back to the DNS host website
o Sign into the DNS host website
o Choose your domain
o Locate where you can edit DNS record
Remove the records
o Locate the TXT and the MX records
o Click on the trash can icon or select the record
o Select remove record